Translate

Tuesday, March 26, 2013

Steamed Sea Bass with Scallions and Ginger


This is a very simple, but very delicious dish I like to serve for company.  It's also one of Mom's favorites, so when she invited her friends Debbie and Mark for dinner, this is what she wanted (along with the citrus roasted asparagus, Parker House rolls, and lime pie...see index to find them).

My friend, Yoda, has been overseeing the kitchen for a few weeks.  I felt I needed to channel my inner Jedi warrior (trying not to mix my sci-fi movies here...).


Anyway, a word on "wok steaming," which is the method used to cook the fish.  I don't want you to be intimidated, or to think you have to go out and purchase bamboo steaming baskets (although they're
nice).  Joyce Chen makes them and they sell for about $15.  If you have these, all you have to do is pour water to a depth of 2-3", then you set the steamer in the wok, making sure that it sits above the water.  To ensure that the steam circulates freely, the plate you put the fish on should be about 2 inches smaller than the diameter of the wok.  
I have used these and the challenge is getting the plate out of the steamer basket without burning your fingers.  You can stack one basket on top of the other, with one plate of fish in each.  However you want to put a smaller piece of fish, or one that is thinner in the top basket, to ensure even cooking.  And you have to be really careful because the very, very hot sauce likes to spill...you know it just occurred to me that you can solve that problem by using a fairly flat bowl, like the one you see below with the sauce in it.  The steam permeates the inside of the basket, so it shouldn't interfere with cooking.

An alternative is using a round cake rack in a wok or another pan with a tight fitting lid.  It needs to sit far enough below the rim of the pan for the plate and fish, and then the lid.  Also some cookware comes  with a steamer insert, which sits below the rim of the pot.  Anything you can rig up to with a plate to sit on a platform, and that allows the steam to surround the fish will do the trick.

I finally bought a Wolfgang Puck wok with a steamer, partly because it is gigantic and sometimes I want to make large quantities of stir-fry, but it came with this great steamer insert that is big enough for a dinner plate.  That's what you'll see in the photo below, and you can see that I got all five pieces of fish on it.

STEAMED SEA BASS WITH SCALLIONS AND GINGER

4 sea bass, 6 oz each
3 scallions, halved crosswise, plus 1 scallion, finely julienned
1 Tablespoon peeled and finely julienned fresh ginger
2 cloves garlic, minced
2 Tablespoons canola or peanut oil
1 Tablespoon light soy sauce
2 teaspoons Asian sesame oil
1 1/2 teaspoons dark soy sauce
1 1/2 teaspoon oyster sauce
1 teaspoon sugar
1 teaspoon cornstarch
1/8 teaspoon ground white pepper


 Here are my favorite brands that I buy at the local Asian grocery:

Pearl River Bridge superior light soy sauce

Pearl River Bridge superior dark soy sauce
 Lee Kum Kee Panda Brand oyster sauce
 Kadoya pure sesame oil

 Measure the fish fillets at their thickest point.  (You will want to cook them 10 minutes for every inch of thickness.  I find that it usually takes about 15 minutes.  Having said that, it is very difficult to get uniform sizes, so I also use an instant-read thermometer, looking for 150 degrees or more.)

Make a bed of the halved scallions on a plate large enough to hold the fish and suitable for steaming.


Place the fillets in a single layer on the bed of scallions.  Cover and refrigerate until ready to steam.


Place a bamboo steamer on the bottom of a wok or large, deep frying pan and pour in water to a depth of 2 inches.  The water should not touch the steamer.  Bring the water to boil over high heat.

Meanwhile, in a bowl, stir together the ginger (julienned like this),


garlic, 1 Tablespoon of the canola or peanut oil (I like the flavor of peanut oil better), light soy sauce, sesame oil, dark soy sauce, oyster sauce, sugar, cornstarch and white pepper.


When you are ready to begin cooking, spoon the mixture evenly over the fish fillets.  Place the plate on the steamer above the boiling water,


and steam the fish over high heat for 10 minutes per inch.  When they are cooked through the fish will flake easily with a fork.  Turn off the heat under the wok to reduce the chance of burning yourself with the steam.

Here it gets tricky.  Usually I serve this with rice, but this time I didn't.  If you are serving it with rice (which is delicious because it soaks up the sauce), have the plates with the rice on it read to receive the fish.  Then transfer the fish to each plate, making sure not to capture any of the scallions, as they are there for flavor only and should be discarded.

Spoon any sauce remaining on the plate over the fish.

In a small pan over high heat, heat the remaining 1 Tablespoon canola (or peanut) oil until it is almost smoking.  Place the julienned scallions


on top of the fish.  Carefully drizzle the hot oil over the scallions (they will make a delightful sizzling noise).

This recipe would also work well with halibut.

Serves 4.

Sunday, March 24, 2013

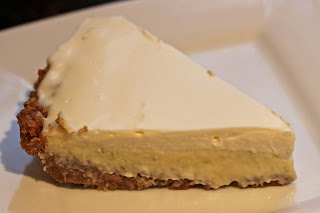
Lime Pie


This is not a key lime pie.  Key limes are somewhat milder in taste and less green in color.  I like the extreme lime-ness of regular Persian limes better.  This is another recipe that originated in Rosie's All-Butter Fresh Cream Sugar-Packed No-Holds Barred Baking Book.  I started tweaking the graham cracker crust many years ago, and more recently, I've, shall we say, expanded on the sour cream topping.

Here's my reasoning.  Graham cracker crusts can be a little one note, and that note to me is flat.  So I started by adding 1/4 teaspoon cinnamon, then 1/4 teaspoon cocoa powder.  That livened things up.  I have to really dig back into my childhood for the next change.  When I was a kid, my mom made a chocolate cream pie (chocolate pudding mix to be precise), and she added walnuts to the graham cracker crust, and they sort of caramelized when it baked, because of the sugar and butter.  That gave me the idea of toasting some pecans, then grinding them up and adding them to the graham cracker crust.  I also struggled to make the crust fit in the pan...it seemed like there was never enough.  So I increased all of the ingredients just a tad, and now I have a nice thick crust.  It ends up tasting almost like a cross between a cookie and candy...you'll see.

A few months ago I was making this pie, and it occurred to me that it's hard to spread the sour cream over the hot pie filling.  So I just increased the amount, this time to 1 1/2 times as much as the original recipe called for.  Now it's easier to spread and it completely covers the filling.  Curiously, I've been thinking it's because I use a 10-inch pie pan, but I just checked my cookbook, and they claim that the original recipe works for a 9-inch or a 10-inch pan, so I just think they want a thinner layer.  Trust me when I say that you'll LOVE the thicker crust.  By the way, a thank you to our friend Elia, who gave us this ceramic pie pan many years ago.  It is now the ceremonial lime pie pan.  The photos will show you why.

A side note.  I used to be able to find Nabisco Honey graham crumbs at the supermarket, but strangely now I can only find Keebler's.  They don't taste right to me, so I smash up a package of graham crackers and keep the extra in the freezer for the next time.  Hmm...I wonder if I can find them on Amazon.  The packaged ones are much more uniform than what I've been able to do.  I just looked them up and you can only buy humungous quantities, so I guess I'll have to work on my crushing abilities.

Mise en place:

 LIME PIE

Graham Cracker Crust:

1 1/2 cups graham cracker crumbs (see above)
1/4 cup superfine sugar
8 Tablespoons (4 oz) unsalted butter
1/2 cup toasted pecans, ground but not turned into pecan butter :)


1/4 teaspoon cinnamon
1/4 teaspoon cocoa powder

Preheat the oven to 375 degrees.

Spray your pie pan with Pam (so you'll be able to get it out later...).
Stir all of the ingredients except the butter together in a medium sized bowl.  Add the melted butter and toss until the butter is evenly distributed.


Pat the crumbs firmly over the bottom and up the sides of a 9-inch or 10-inch pie plate.


Place the pie plate on the center oven rack and bake until the crust is crisp and golden, about 8 minutes.

Allow the crust to cool completely on a rack before filling.

Filling:

1 can (14 ounces) sweetened condensed milk
1/2 cup plus 2 Tablespoons (5 oz) fresh lime juice (5 to 7 limes).  Add some ReaLime if you can't get      
         enough juice out of the fresh limes.
2 large eggs, room temperature
2 Tablespoons grated lime zest
Dash of salt

Topping:
12 ounces sour cream
6 Tablespoons super fine sugar
1/4 teaspoon salt

Preheat the oven to 350 degrees F.

Place all the filling ingredients in a medium-size mixing bowl and stir them with a whisk until they are completely mixed.

A note on lime zest.  A microplane zester makes this the easiest thing you can do.  Lime skins consist of the zest (the green outer part with all the flavor) and the pith (the bitter white part).  The extreme sharpness of the microplane makes it easy to just get the zest, with none of the pith.  Definitely worth the investment.


This is about how much lime zest you want (it's almost impossible to measure it in a spoon):


Also, before you cut the limes in half to squeeze the juice (or use a fancy juicer like I have), roll and press on them on the counter top to release the juice from the pulp.


Even so, I often come up a little short for this recipe, or I lose patience, and then I use the ReaLime.


Be sure that you thoroughly whisk all of the ingredients.  You're not done until you can't see the egg whites.


Pour the filling into the pie shell.


Bake the pie on the center oven rack until it begins to set, 10 minutes.  Remove the pie from the oven and increase the heat to 425 degrees F.

Whisk the topping ingredients together in a small bowl and spread the topping over the pie.


Bake the pie for 5 minutes more.  The topping will be loose when you remove the pie, but it will set as it cools.  Cool on a rack, then chill the pie for 6 hours before serving.


One of the great things about this dessert is that you do it first thing in the morning, and then you don't have to think about it until you serve it.  Quite a plus when you're serving guests.  Also, it will bleed (the butter seeps out of the crust and some of the liquid seeps out of the filling) after it is cut, but we just discovered that you can cut the leftovers (if there are any) and freeze them in individual slices.  Then all you have to do is put it on a plate and leave it out for about 45 minutes.

Tuesday, March 19, 2013

Flops

Sometimes, despite your very best efforts, a cooking project  fails.  It happens to everyone.  Usually, we stay within our comfort zone, choosing recipes that are familiar enough to guarantee at least an edible outcome.  But every now and then it's important to stretch ourselves with something challenging.  I had one of those experiences on Sunday, when I decided to try the "New England Cinnamon Sugar-Cider Donuts" from a recipe in last month's issue of Saveur.  They looked wonderful, so I bought the graham flour and boiled apple cider that the recipe called for.

Since it was a brand new recipe, and I've only made donuts a few times before, I very careful checked and double-checked my ingredients.  I know that I followed the recipe to a T.  I heated the oil in my deep fryer to 350 degrees F, just like the recipe called for.  The recipe was described as wet and sticky, which mine certainly was.  You were supposed to oil your hands and roll about 1/4 cup of dough in you hands into a ball.  Then you use your thumb to make a one and half inch hole in the center.  Then you drop it into the hot oil.  I followed those directions exactly, but when it went into the oil, the dough just disintegrated.  I had put about three donuts-worth into the oil, and this is what came out:


It was basically fried crumbs.  I have considered everything that could have gone wrong, and I really do not know.  I have no real desire to try this recipe again, since I don't know what to correct.

So next weekend, I'm going to use a more traditional recipe for donuts with these flavors, but one where you refrigerate the dough for a half hour and roll them out in flour.  I'll let you know how that turns out.

Tuesday, March 12, 2013

Curried Chicken Potpie


Remember the chicken pot pie?  I thought it was just too bland.  If you think about it, the main flavor is salt.  So yesterday I decided to make a much spicier version, which complements the pie crust.  You can really make a pie out of any fairly loose stew.  You want there to be some liquid to absorb into the bottom on the crust as it bakes, and then you want to be able to break up the crust into the stew.  This is real eat-at-home comfort food.  Here's what I came up with and I have to say it was a HUGE improvement.  The filling is completely different, but the process is the same.

CURRIED CHICKEN POTPIE

1 1/2 pounds skinless, boneless chicken thighs, cut into 1-inch pieces
1 red pepper, cut into 1-inch pieces
1 green pepper, cut into 1-inch pieces
2 Tablespoons canola oil
1/2 to 1 Tablespoon green curry paste
1 can coconut milk
3 Tablespoons fish sauce
1/3 cup chicken broth
2 Tablespoon dark brown sugar
1/4 cup chopped basil (or 2 Tablespoons Garden Gourmet Basil)
Dough for a double crusted pie (see recipe for Chicken Potpie)

Saute peppers in canola oil until tender, then with a slotted spoon, remove them to a bowl.  Add the chicken pieces to the oil and saute until no longer pink.  Remove with a slotted spoon to the same bowl.

Drain the skillet of the oil, and then pour in the coconut milk and the green curry paste.  This is strong stuff, so if you just want a hint of curry, use 1/2 Tablespoon.  If, like us, you like some heat, go for the 1 Tablespoon.  Stir and simmer for 5 minutes.

Add the fish sauce, chicken broth, brown sugar, basil, chicken and peppers.  Let simmer for 10 minutes, then cool at room temperature for 1 hour.

Make the pie crust and let it rest in the refrigerator for 30 minutes.

Preheat oven to 400 degrees F.

Divide the chicken mixture among the four ramekins (mine hold about 1 1/2 cups, but were only about 1/2 full).  Mine measure 6" across.

Roll it out into rounds that are 2-inches bigger than the ramekin you are using.  Crimp them and cut vents while on the cutting board, then transfer them to the ramekins.  I pushed them down so that they were in contact with the liquid.

Bake for 25 to 30 minutes, until the crust is nice and brown.

World Peace Cookies


About the name.  This recipe was in the Sunday New York Times magazine, and comes from Dorie Greenspan, who was doing a pop-up bakery thing with her son.  There was no explanation given for the name, so I made up my own.  I think that if everyone has a World Peace cookie they will be so busy savoring the wonderful, deep chocolate flavors that they won't want to fight anymore.  This cookie needs to just melt in your mouth, which keeps you busy for a while.  As we ate them last night, we also noted that they make you feel happy, so maybe that's it.  If anyone else has another idea, let me know.

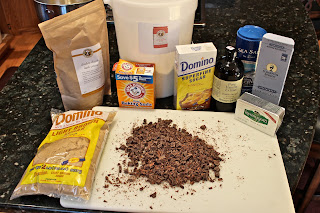
About the chocolate.  The recipe calls for natural unsweetened cocoa powder, but I really like them best using King Arthur's Double Chocolate cocoa powder.  Dorie Greenspan specifies extra-bittersweet chocolate (not to exceed 85%), and I like Scharffenberger's bittersweet, which is 70%.  Other than that, it's pretty straightforward.


WORLD PEACE COOKIES

1 1/4 cups AP flour
1/3 cup natural unsweetened cocoa powder
1/2 teaspoon baking soda
5 1/2 ounces unsalted butter, room temperature
2/3 cup (5 ounces) packed golden brown sugar
1/4 cup superfine sugar
1 teaspoon vanilla extract
1/4 teaspoon sea salt
5 ounces extra-bittersweet chocolate (do not exceed 85%), chopped (no pieces bigger than 1/3 inch)


Sift flour, cocoa, and baking soda into medium bowl.


Using an electric mixer, beat butter in large bowl until smooth but not fluffy.  Add both sugars, vanilla, and sea salt; beat until fluffy, about 2 minutes.


Add flour mixture; beat just until blended (mixture may be crumbly).  And it will look like mud.


Add chopped chocolate; mix just to distribute (if dough doesn't come together, knead lightly in bowl to form ball).  Divide dough in half.


Place each half on sheet of plastic wrap.  Form each into 2-inch diameter log.


Wrap each in plastic; chill until firm, about 3 hours.

DO AHEAD:  The dough can be made 3 days ahead.  Keep chilled.

Preheat oven to 325 degrees F.

Line 2 baking sheets with parchment paper.  Using thin sharp knife, cut logs crosswise into 1/2-inch thick rounds.


Space 1 inch apart on prepared sheets.


Bake 1 sheet at a time until cookies appear cooked (cookies will not firm or golden at edges), 11 to 12 minutes max.  Be careful not to overcook them. Transfer to rack; cool.


DO AHEAD:  These cookies are absolutely wonderful right out of the freezer!

Orange Chocolate Chip Pecan Cookies


I was feeling a little bored with the usual cookies, so I experimented a bit.  I love the combination of orange and chocolate, so I thought, why not put them together in a cookie?  I contemplated my basic recipes, which are toll house, sugar, and shortbread.  I eliminated the toll house base because of the brown sugar, it just didn't seem to go with the orange flavor.  I think either the sugar cookie or shortbread would be excellent, but I decided to go for the sugar cookie because it is a little lighter (if you can call a confection made of butter, sugar and flour, light).

ORANGE CHOCOLATE CHIP PECAN COOKIES

1/2 cup (4 ounces) unsalted butter, at room temperature
1/2 cup (4 ounces) canola oil
1/2 cup superfine sugar
1/2 cup confectioner's sugar
1 egg, room temperature
1/2 teaspoon vanilla
1 teaspoon orange oil
grated rind of one orange
2 1/3 cups AP flour
1/2 teaspoon baking soda
1/4 teaspoon sea salt
3/4 cup toasted pecans, cut in small pieces
3/4 cup bittersweet chocolate chips


Sift the flour, baking soda and salt into a medium sized bowl, and set aside.

Using a mixer fitted with a paddle attachment, beat the butter in a large bowl on medium speed about 1 minute.  One ingredient at a time, add the vegetable oil, granulated sugar, confectioner's sugar, egg, vanilla, orange oil and orange zest, beating on medium speed after each addition until completely incorporated.  Add the flour mixture all at once and mix on low until incorporated.  Dough will be soft.
Stir in pecans and chocolate chips with a rubber spatula.

Refrigerate about 1 hour to make it easier to handle. 

Preheat oven to 350°F.  Line baking sheets with parchment paper.  

Using a #40 cookie scoop (about 2 Tablespoons), drop the dough on the prepared baking sheets.  The cookies should be spaced about an inch and a half apart, so I usually get 12 to a sheet.  Press the dough evenly with the palm of your hand to flatten the cookies to 1/2-inch thickness.

Bake for 14-16 minutes until the edges turn golden.  Let the cookies cool on the baking sheets at least 10 minutes before transferring them to racks to cool completely.


Friday, March 1, 2013

Caramelized Black Pepper Chicken


This is my other favorite Slanted Door recipe.  It may be that the restaurant recipe is a little more complicated, in fact, I'm sure it is, but this one captures the flavors of Vietnam very well.  At our house we call this Vietnamese comfort food, and when I make it everyone remembers it and looks forward to the next time we'll have it, so it is definitely a winner.  What I love about it is that it's easy and quick, but the flavors are complex and absolutely addictive.

A couple of new ingredients to add to your list.  First is palm sugar, which is made from the syrup of the palm tree, and is available in the foreign food section of some supermarkets or you can find it at an Asian market.


In this recipe, I like to use Laxmi brand ginger paste and garlic paste because they dissolve in the sauce which makes the sauce richer and smoother.


Also, I have intermittent success finding Thai bird chiles, but have used serranos or jalapeƱos with good results.

CARAMELIZED BLACK PEPPER CHICKEN

1/2 cup palm sugar or dark brown sugar
1/4 cup fish sauce (nam pla)
1/4 cup water
3 Tablespoons rice vinegar
1 teaspoon garlic paste or finely minced garlic
1 teaspoon ginger paste or finely grated ginger
1 teaspoon coarsely ground pepper
2 fresh Thai chiles, halved
1 Tablespoon canola oil
1 shallot, thinly sliced
1 pound skinless, boneless chicken thighs, cut into 1-inch pieces
4 cilantro sprigs

In a small bowl, combine the sugar, fish sauce, water, rice vinegar, garlic, ginger, pepper and chiles.


Heat the oil in a large deep skillet or wok.  Add the shallots


and cook over moderate heat until softened, about 4 minutes.


Add the fish sauce mixture and the chicken


and simmer over high heat until the chicken is cooked through, about 10 minutes.  Transfer to a serving bowl, garnish with the cilantro and serve over rice.

Serves 4.