Translate

Saturday, September 29, 2012

Measuring Up

When I started this blog, one of my goals was to make baking and cooking simple.  I've learned so much, often the hard way, that I would like to save you the trouble of repeating my mistakes.  I also suspect that many recipes make the assumption that they either don't have to explain measurements and ingredients, or they assume more cooking expertise than the average person has.  What I hope to do for you is to make it very clear exactly what you are supposed to do, so that your results will be exactly like mine.

Measuring Cups and Spoons:  When I was a little girl, my mother didn't use proper measuring spoons.  She used the teaspoon and Tablespoon from our silverware when she was baking, so that's what I started out with.  I couldn't help but notice that some of our teaspoons were bigger than others.  But because she had always cooked that way, she was used to the results she got using this somewhat imprecise measurement.  And they were close enough that there wasn't too much of a problem.  She also used her pyrex measuring cup to measure pretty much everything.

Then, in Junior High, I had my one and only Home Ec class, and I learned that measuring spoons are more accurate than silverware, that liquids should be measured in the glass measuring cups, but that dry ingredients should be measured in metal or plastic cups designed for that purpose.  The first measuring spoons and cups I bought came from the local supermarket and were, shall we say, inexpensive.  They weren't pretty, but they did the job.

When I started to really get interested in baking, I bought stainless steel measuring spoons and cups from Williams-Sonoma that look like this:


However, these spoons did not fit easily into spice jars, so later I bought these:


And to make my life easier, I bought the odd-size groups (1/3, 2/3, 1 1/2 cups, 1/2 Tablespoon, 3/4 teaspoon).


Then, about 10 years ago, Steve and I went on a tour of the Scharffenberger factory in Berkeley (before they were bought out by Hersheys, which is the topic for another blog on chocolate), and in their gift shop I found the Cuisipro measuring spoons that I use most often today.  They have a wonderful feel in your hand, and it is easy to level off the top.  Besides, they're just pretty to look at:


And about five years ago, OXO came out with their very cool measuring cups that let you see what the measurement is from the top, along with the very useful 1/4 cup measures:


I always felt a little uncomfortable with the glass measuring cups because you had to get down to eye level to see the measuring lines, and the angle seemed to change it appreciably.  With the new angled ones, I feel I get much more consistent results.

Scales:  Once I got serious about baking, I started reading recipes that talked about weighing ingredients rather than using measuring cups and spoons.  That's when things got really confusing, and I still find my self not quite sure at times.  Here's the bottom line:  many cookbooks are written by people who work in bakeries or restaurants, and in those settings, measurement is always done by weight (Imagine the impracticality of measuring out 32 cups of flour, not to mention keeping track of them).  When they write the cookbook, they try to change those recipes into cups and teaspoons, which leads to some errors.  The best cookbooks have been kitchen-tested (meaning someone actually cooks the item from the recipe in the book), but too often, there isn't that level of care taken.

When you bake something and it fails (I mean spectacularly fails like the chocolate chip-pecan scones that become one large spreading mass on the cookie sheet that we dubbed the "chocolate chip gooey things" or the pecan bars that cooked over onto the oven which then caused an impressive fire in the oven two days before Thanksgiving when I tried to clean the mess up with the self-cleaning cycle), I think our first impulse is to blame ourselves.  After all, we're the amateurs and they're supposed to be the professionals.  Now that I have more experience and I can see the patterns in baking recipes, it is easier to recognize whether the problem is intrinsic to the recipe or whether I have made an error.

So back to scales and weighing.  There has been a recent trend to give alternate amounts, in weights and measures.  On the King Arthur Flour website, there is even a little radio button that allows you to see it either way.  And flour is one of the prime ingredients that can convince you to begin weighing rather than measuring.  The problem is that flour likes to settle as it sits.  I used to just scoop up the flour with the measuring cup, level it, and throw it into the bowl.  That measuring style will result in getting more flour than the recipe calls for, because the flour is packed into the measuring cup.  Many baking books now recommend taking a spoon and aerating the flour (a fancy way of saying stir a little air into it), then spoon the flour into the measuring cup.  They say that will give you an accurate measurement.  It certainly is more accurate than the scoop and level method.  But a cup of AP flour always weighs 4.25 oz.

The day after I wrote this, the current issue of Bon Appetit arrived.  And lo and behold, they had an article on cake recipes, and in the back, under "Prep School," they declared that scoop and level is fine, just aerate the flour with a whisk.  Great.  So apparently for these particular recipes, the measurements will be accurate with scoop and level.  But that got me to wondering what the difference might be.  So I measured out 3 cups of flour for chocolate chip cookies (recipe follows), using scoop and level.  Then I weighed it.  It came in at 14 5/8oz.  I have a scale that converts between weights and measures (I know, I know, who else has these things ?), and that is actually 3 1/3 cups + 1 1/2 Tablespoons of flour.  Three cups of AP flour would weigh in at 12 3/4oz.  That will absolutely make a difference in how your baked goods come out.  This is the kind of thing that drives me nuts.  How are you supposed to know how they actually measured if they don't tell you???

Another example is sugar.  Measuring granulated white sugar with a cup is easy.  It doesn't have the packing problem that flour does.  However, most recipes that call for brown sugar will say, "packed brown sugar," meaning that you should pack as much as you can get into the measuring cup.  It really is easier to measure it by weight.  1 cup of granulated sugar weights 7 oz., while 1 cup of light brown sugar weighs 7 1/2 oz.  And the 1 cup measure is supposed to hold 8 oz., right?  Are you confused yet?
So I measured out 1 cup of brown sugar, packing it down as hard as I could right up to the edge of the measuring cup.  Then I weighed it, and it came in at 6.8 oz and converted to 3/4 cup + 3 Tablespoons.  That's not bad, and you might not miss that 1 Tablespoon of brown sugar.  But trust me, I really packed it down to get that close.

Butter is always sold by weight.  The Lurpak I bake with comes in 8 oz. packages, or if you buy sticks of butter, they're always weighed out to 4 oz sticks, with little marks where the tablespoons are, 8 to a stick.  So you already know that there must be 2 tablespoons in 1 oz of butter.

I think the more you can think in both weights and measures, the better off you are.  My rule of thumb is:  weigh flour, sugar, butter, and shortening, then measure everything else.

CHOCOLATE CHIP COOKIES

This is a double recipe, because you can always find someone to give them to.

1 1/3 cups (9 1/3 oz) unsalted butter, room temperature
2 cups packed light brown sugar (or 15 oz)
2 eggs, room temperature
2 teaspoons Penzey's double vanilla
3 cups AP flour, scoop and level (or 14 5/8oz)
1 teaspoon baking soda
1 teaspoon sea salt
2 1/2 cups chocolate chips or chunks

Optional:
1 1/2 cups toasted pecans or walnuts, chopped

At least an hour or two before you plan to bake, bring butter and eggs to room temperature.  You can make your job easier by slicing the butter into pieces and throwing them into the mixing bowl at this time.  It's also a good time to toast the nuts, if you're using them, so they'll have a chance to cool (about 8 minutes at 350 degrees F).

Preheat oven to 360 degrees F.  Line baking sheets with parchment paper.

Cream the butter and brown sugar in the mixer with the paddle attachment for about 3 minutes on medium speed, until it's light and fluffy.  Add eggs and vanilla and beat another 2 minutes until they're completely incorporated and the batter looks light and fluffy again.

In a separate bowl, whisk the baking soda and salt into the flour.  Add all at once to the mixing bowl, and mix until evenly distributed, about 2 minutes.  Remove bowl from the mixer.

Stir in chocolate chips.  If you're going to add nuts, stir these in as well.  Using a #40 scoop, which is about 1 1/4 Tablespoons (see the previous blog on the Sugar Cookies about scoop sizes), scoop out twelve cookies per sheet, three across and four down.  They need plenty of room to spread.

Bake for 11 minutes total.  I like to set the timer for 6 minutes, so I remember to turn the pans mid-way, then I set the timer for 5 minutes.  Probably superstitious behavior at this point.

You'll know they're done when the centers of the cookies have risen.  Place them on a cooling rack for 5 minutes, then transfer the parchment to the counter top.  They need time to set, but if you let them cool completely on the pan, they'll cook too much.  Makes about 4 1/2 dozen.

Mom and Steve like these best right out of the freezer.  Myself, I like them hot out of the oven.


Saturday, September 22, 2012

Modern Appliances

September 13, 2012

We moved to this house a little over four years ago, after pretty much gutting it and starting over.  I LOVE many things about my kitchen (the island, the spice pantry, the incredible storage capacity).  But I did make a couple of major mistakes, so I want to pass my experience along, just in case it can spare another person from going through what I have.  First, though, I have to admit that I may be a little obsessive-compulsive about certain things...I say this in the garden variety sense rather than the clinical sense (ha, ha).


When planning and designing the kitchen, I wanted to have two ovens.  It seemed like it would be very handy, for instance, when you want to both bake and broil in the same meal.  Or when two things need to go into the oven at very different temperatures.  I had a little experience with convection, and was not at all convinced that I would use it.  So I sought out conventional ovens, and bought the best double wall ovens that GE made, thinking that the simpler, the better.  How wrong I was!

I just counted, and I have baked in over a dozen ovens.  Until we moved here, though, they were always in a free-standing range, which turns out to make a difference.  The cheaper ones (that hark back to my student days and early married life) were mainly annoying because they heated up the whole kitchen due to poor insulation.  I was always able to figure out how to adjust the temperature and  baking times, based on my standard chocolate chip cookie recipe.  That was a reliable way to know whether I needed to increase or decrease the temperature stated in the recipe.  The very best one was a Kitchenaid oven.  It was true to temperature and cooked evenly throughout the oven cavity.

So we moved here, and from the beginning, nothing seemed to bake the way it used to.  Mostly the oven seemed too slow (cool), although occasionally there would be sudden bursts of heat that would scorch the top of something that wasn't yet cooked in the middle.  For the first few months, I chalked it up to the "getting to know you" phase of dealing with a new oven.  Finally, after about six months, when I baked au gratin potatoes for a dinner party, and two hours later they still weren't done, I had to acknowledge that there was something wrong with the ovens rather than with me.  That started about a two year merry-go-round of service visits to re-calibrate the ovens, with repairmen agreeing that the temperature seemed off, but that it was sort of normal for the temperature to fluctuate.  They would patiently explain to me that ovens are NEVER one temperature, but that they FLUCTUATE around a temperature.  Duh.  However, my ovens fluctuated + or - 50 degrees.  Eventually, the GE certified repairman confirmed that, but also that GE considers that to be an acceptable level of fluctuation.  OK, fine, it's acceptable for them.  But food doesn't really cook well at 295 degrees when 350 is what you're aiming for.  Especially if it suddenly spikes up to 405 degrees.

So began my quest for new ovens.  I scoured the internet, even sending some queries out into the ether, and eventually settled on the Wolf ovens that I now have and love.  I called Wolf before spending an outrageous amount of money on them, and they assured me that their ovens only fluctuate + or - 5 degrees.  And do you know what?  It's true.  Now when I set the oven for 350 degrees, that's pretty much what it is.


Along the way, though, I learned some interesting things.  First, is that free-standing ranges have much better insulation, and consequently they hold a temperature better.  Second, even if you will never use the convection feature, it is still important to purchase an oven with it, because that's where all of the engineering know-how has gone for the past twenty years.  They're just better ovens.  They treat their non-convection brethren like long-lost relatives they're ashamed of.   Third, you should remove any racks from the oven that you are not using because the racks affect how the heat is distributed in the oven cavity.  Most of the time, you will be baking with only one rack.  I know that they say you can cook two batches of cookies at the same time, but my experience has been that it will interfere with the heat flow both because of the second rack and because of the second baking sheet.  Besides, how long does it take to bake a batch of cookies?  8 to 10 minutes, right?  So it'll take twice as long.  Big deal.

If I had an absolutely blank palette to create a kitchen now, I think I would start with a huge Wolf free-standing range with a double oven.  They're gigantic.  But think of all the burners and doodads you could have on top!  Then I would design the kitchen around it, with lots of counter space (quartz, not granite, so it would never need to be sealed), and I'd reproduce my storage space and spice cabinet.  And I'd make sure to have two dishwashers (I LOVE my Bosch).  It will probably never happen, but perhaps there is one person out there who will have that opportunity....

The second major appliance that I have been deeply disappointed in is the energy-efficient Whirlpool front-loading washing machine.  Part of the problem may have been that I bought the storage drawer for it to sit on, elevating it to a convenient height, but also introducing more rotational movement (apparently), since it has been trying to escape for the past four years.  At times, it can make it half way across the laundry room in a week.  It also sounds like a jet engine warming up.  And it does NOT get the clothes clean.  If I get any kind of food stain on my clothes (and trust me that is almost a daily event), I will end up pre-treating and soaking, which would seem to me to undermine the energy and water-saving features of this type of machine.  AND it takes almost an hour to do one load.  Then it takes another hour or so to dry them.  Three loads of laundry can take most of a day.  And there is a persistent and evil mold growing around the rubber gasket around the door, so nothing smells clean about it.

The dealer and I have had many fascinating meetings over this machine as well.  They insist that most other people do not have the same complaints that I do.  Does that mean they never get stains on their clothes?  They suggested special shock absorbers to keep it from walking, but MY washer walked right off of them!  They insisted that the incredible shaking, shuddering, and gyrating was because the floor tile was "too expensive."  They claimed to find nothing wrong with the balance.

Then, yesterday morning, in the middle of a load of towels, the machine seized up and made a whole new set of horrifying sounds, which I think was whatever had been loose before, coming unhinged.  So I turned it off, removed the towels, and with a sigh of relief, started researching a new washer.  It turns out that there are an army of folks like me who have been underwhelmed with the front-loaders, with their fancy electronic displays and special products to try to get rid of the foul odor.

After an entertaining afternoon on the internet, I decided to go back to the past.  In 1986, I bought a Maytag washer.  That was back when they were made out of metal and had rotary dials.  It lasted almost 20 years with perhaps one repair.  It was quick, it got clothes clean, and it was possible to keep it clean.  I replaced it with another Maytag, but by the 2000s, the machines were being made out of plastic in China.  Enough said.  My research led me to the Speed Queen top-loader, the same folks who make the ones in laundromats around the country.  They're a little more expensive than some, but they're made out of stainless steel and porcelain, and come with a 3 year warranty.  The wash cycle takes 30 minutes, and drying time is decreased because the spin cycle is more effective.  It's being delivered next week, and Steve is threatening to move the Whirlpool to the front lawn to use as a planter with a sign on it that says, "This is what this is good for."


September 21:  On Wednesday, my new washer arrived.  There's nothing fancy about it, but it does have variable levels of water depending on the size of the load, and it does only take 30 minutes.  I went to work on some of the (many) old stains and they're already mostly gone.  The machine isn't chic nor do they come in colors ("You can have any color you want as long as it's white," is their motto).  It makes a little noise, but can't even come close to the old Whirlpool.  So I'm satisfied.

The moral to this little tale is, you have to be very careful when buying appliances these days.  Gone are the days when a brand like GE or Whirlpool stands for anything.  We used to rely on Consumer Reports, but we no longer subscribe because we've gotten burned so many times, and have disagreed with their evaluations.  The local appliance dealers haven't been much help.  They're limited by the brands they carry, and they're invested in selling, not giving an honest assessment.  Sometimes the repair department can be helpful, at least in identifying which brands and models have the most frequent requests for repairs.  But more often, I just do an internet search and start to read until a consensus starts to form (at least in my mind).  I'll type in something like "best wall ovens" or "best washing machine," and start reading.  It's kind of amusing, because the people most likely to write reviews are those with strong opinions, and some of them are quite eloquent.

The other point is that it is all too easy to blame yourself when you don't get a good result:  I must not have read the directions, maybe I didn't preheat the oven long enough, maybe I'm using the wrong laundry detergent, etc.  But sometimes, it really is the equipment, not the user, despite what the repair technicians may say.  So if you find yourself questioning which it is, I encourage you to problem-solve as much as you can, then go on the internet and see what other people are saying.  I have no regrets about replacing either the ovens or the washer, because the stress they were causing far outweighed the cost, and because there really did not seem to be a remedy for either problem.  Better yet would be to have done much more careful research at the outset, which is the message that I leave you with.

Tuesday, September 18, 2012

Brownies

Brownies were the very first thing I learned to bake, when I was 10 or 11 years old.  Because I was impatient, I immediately modified my mother's recipe by melting the butter and chocolate squares together.  They turned out gooey and chewy, so I just kept doing it that way.  Later on, I got lazier, and relied on my good friend, Betty Crocker, especially when she started including things like packets of Hershey syrup in the mix.  My kids didn't like nuts in theirs, so I usually made them without.

Over the years I have tried lots of different brownie recipes.  One that I favored for a while had Grand Marnier in it, so they tasted of orange.  Another had browned butter in it, but I couldn't really taste the browned butter by the time the chocolate was added, so it seemed like a wasted effort.  I kept looking for that perfect brownie.

Last Christmas, my daughter-in-law, Cindy, gave me Nancy Silverton's new cookbook, Mozza.   I started trying her wonderful recipes, especially her pizzas.  So when Steve and I went to Santa Monica in May, we visited Mozza Restaurant, which had so many wonderful things it was hard to choose.  (We highly recommend a pilgrimage there if you go to L.A.  We went at lunch time, when it isn't so crowded).  I knew that Nancy Silverton had been considered one of the best pastry chefs in the country, and I found out that there was an outlet of the La Brea Bakery at LAX.  So when we were on our way home, we picked up sandwiches, and some desserts.  Somewhere over the middle of the country, I bit into THE VERY BEST BROWNIE I had ever tasted.  It had the wonderful brownie crust on top, but the middle was like chocolate fudge, with crisp toasty walnuts.  As soon as I got home I searched the internet and found the recipe, and ordered a copy of her out-of-print La Brea Bakery cookbook.  I've made the brownies many times since then, and the recipe that follows is hers.  However, I am adding the things I've learned about baking them, and some variations.

Your first challenge is to find an 11x17x1-inch jelly roll pan.  I happened to have about a 40 year old one residing in my pantry, but it was pretty tired looking.  When I looked on the internet for a new one I couldn't find one that size.  The closest I have been able to find was at Sur La Table, a Chicago Metallic Commercial II half sheet pan, which is 12x17x1-inch.  I also bought a 10x15x1-inch pan at Williams Sonoma.  You'll see why in a moment.

CLASSIC LA BREA BAKERY BROWNIES 

3 cups (12 oz) walnut halves
3 sticks (12 oz) unsalted butter
1 pound bittersweet chocolate (the best you can find)
3 1/2 cups (1 lb, 9 1/8 oz) superfine sugar
6 extra large eggs
1 Tablespoon double vanilla
3/4 teaspoon Kosher salt (or fleur de sel*)
3 1/4 cups (12 3/4 oz) unbleached pastry flour or AP flour

*fleur de sel is the premium sea salt from certain areas in France.  I buy mine when I'm there or at Williams Sonoma

Here's your mise en place:


Preheat oven to 375 degrees.  Spread the walnuts on a baking sheet, and toast in the oven until lightly browned, 8 to 10 minutes.  Shake pan halfway through baking to ensure the nuts toast evenly.  Use the smell test, which is basically that when you can smell walnuts, they're probably done.  They should look lightly brown.  Cool completely.

Lower the oven temperature to 350 degrees.

Brush the 11x17x1-inch jelly roll pan with melted butter.

If you have a double boiler, you can use it.  I find that having a bowl with a handle (like my mixing bowl) is easier, so I just put it over a saucepan.


 Put about an inch of water in the saucepan, and heat it to boiling over medium high heat, then immediately turn it to low.  Cut the butter into chunks, and put it in the bowl first, then the chocolate, also cut up into chunks.  As you may know, chocolate may seize up while melting, but when it has butter in with it, that is much less likely.  I put the butter in first, so it will melt underneath the chocolate, which further insures even melting.  It should look like this:


Once it starts to melt, start to whisk.


Continue whisking until the chocolate has just melted.


Immediately transfer it to a kitchen towel on the counter (to be sure none of the condensation on the bowl gets into the chocolate--a guarantee that it'll seize up), and let it cool while you make the brownie batter.

Sift flour into a medium-sized bowl.


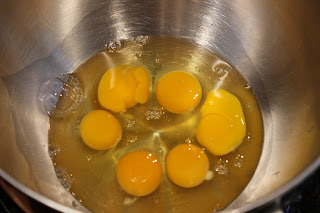
In the bowl of an electric mixer, put the six eggs,


sugar, vanilla extract, and salt.  Beat with the whisk attachment on medium-high until thick and mousse-like, 5 minutes.


See how light and fluffy it gets?

Now add the flour in 3 batches, turning the mixer off before each addition and mixing on low speed until combined.  You will lose a little volume in the eggs, but it should still be pretty fluffy.


Remove bowl from mixer, and with a rubber spatula fold in melted chocolate mixture until the batter is uniform in color.  Think of this batter as like a mousse.  You don't want to deflate the eggs by stirring, rather you want to use the spatula to gently scrape from the bottom (where all of the chocolate will go anyway) up around the sides.  It's a gentle lifting and then circling the bowl.


Continue folding until the color is uniform,


then gently fold in the walnuts.

Pour the batter into the prepared jelly-roll pan; spread to an even thickness.


Bake for 35 minutes, until the brownies are puffed and not quite firm to the touch.  The first time I made them I was worried that they would overflow the pan, since they came right up to the top, so I put a baking sheet under them.  Then I discovered that, like a soufflé, they rose straight up and they didn't drip at all.


A toothpick inserted into the center should come up with sticky batter on it.  It should look like the one on the left not the one on the right.


Place them on a rack to cool completely.  The center will fall and they'll look like this:


When they are completely cool (which will take several hours), cover them completely with plastic wrap and put them in the refrigerator until the next day.  Yes, you will have to resist the tantalizing aroma and WAIT!  The first time I made them we ate them that same day, and we all thought they were okay.  Then I cut them and put them in the freezer drawer, and the next time we tried them, they were AMAZING.  So definitely, plan ahead a day and you'll be rewarded for your self-control.

After a day in the refrigerator, I usually cut them into squares and put them in freezer bags.  They're rich, so I don't make them overly big.  Nancy Silverton's are 3-by-4 inches, which is huge.  I usually go for 3-by-2 inches.  Still, it makes plenty to share.

ISABELLA'S BROWNIES

These brownies, which are actually the ones pictured above, are made without nuts.  The only change I made was to use the 10x15x1-inch pan, so they wouldn't get too thin and lose the yummy gooey center.

Everything else is the same, including the cooking time.


MATT'S BROWNIES

Since Matt doesn't like nuts in his baked goods, I substituted 2 cups of Toffee bits (the same ones I use in the Blondies).  They are made with almonds, so not good for anyone with tree-nut allergies. Use the larger jelly-roll pan, 11x17x1-inch.  Baking time is the same.  The Toffee bits do blend in to the batter a bit, but these brownies are chewier and have a little crunch to them as well.  They have a lovely buttery flavor that isn't in the others.  So enjoy!

Sunday, September 9, 2012

Variations on Sugar Cookies


Before getting to the cookies, I want to pass along a few things I have learned about freezing food.  There's a difference between short-term and long-term freezing.  In the short term, such as the brief stay baked goods have in the Treat Drawer, a good freezer-quality plastic bag will do just fine.  I like the ones with zippers, for convenience, but the Ziploc type are probably a little more airtight.  For a week or even two, these will preserve the quality of most baked goods.  Towards the end of two weeks, you will begin to notice some dryness, which can be improved by putting a piece of paper towel over it when microwaving.

Now for the more complicated, longer-term freezing.  Buried at the back in Rose Beranbaum's Heavenly Cakes I discovered that most plastic wrap is not really airtight, that, in fact, there are tiny holes in it for "breathing."  This apparently was changed several years ago.  It's important because if you put a cake layer in the freezer, for example, you want there to be water crystals forming inside the cake which will make it more moist, but you don't want the outer layer to dry out.  Typical plastic wrap will lead to such drying.  Luckily, there is a professional-level plastic wrap, Freeze-Tite, that does not have these holes in it and it's stronger (available through Amazon or  King Arthur Flour).  I use it for most baking purposes, such as covering yeasted dough or cinnamon rolls while they rise, and since it's 15" wide, it will stretch across most pans and bowls.  I also use it to freeze dinner leftovers in individual portions (making my own TV dinners for us to eat later). I wrap it first in Freeze-Tite, then give it a second layer of aluminum foil where I write what it is and the date with a Sharpie.  Double-wrapping is critical to preserving foods for the long haul.

When I go to the trouble to make some components of recipes, such as Fennel Sausage or Chinese Barbecued Pork, I will make a large amount.   There's some labor involved, so I figure that if I go ahead and make plenty, I'll have the start of some future meals.  After using what I need for the initial recipe, I portion the rest in 8- or 16-oz portions, wrap them in Freeze-Tite, and then put them in a freezer-quality plastic bag, again writing on it what it is and when it went into the freezer.  I know it sounds like alot of work (all that wrapping, bagging, and writing), but before I did that I would have things languishing in the freezer, eventually getting thrown away because I could no longer remember what it was or how old it was.

Now, on to the cookies.  What I love about these cookies is how soft and light they are.  Partly, that's because I don't overbake them.  Then I freeze them, and we eat them frozen.  If you like them crisper, just cook them a little longer.

Oh, I'd better talk about the flour in these cookies a bit.  The original recipe called for 2 cups of flour, which was clearly not enough.  They spread all over the pan.  So I gradually increased it to 2 1/4 cups, but that is during the winter, when the air is dry.  When I made the ones I took pictures of here, it was a very humid day, and the dough sucked up the flour, which made the sugar cookies spread more than I would like them to.  So when I made the lemon cookies, I increased it to 2 1/2 cups and it was just right.  

What I would suggest is that you start out with 2 1/4 cups and see what you think.  Your goal is to have a cookie dough that is still fairly soft because you are going to refrigerate it (causing the butter to re-solidify somewhat).  If the dough is too soft, the cookies will spread more, which will yield a crisper cookie.  You can look at the photos to compare the sugar cookies, which spread more and are thinner with the lemon cookies, which are much more what I was aiming for.  No worries, though, because they'll taste delicious no matter what.

GIANT SUGAR COOKIES

1/2 cup (4 oz or 1 stick) butter, at room temperature
1/2 cup (4 oz) canola oil
1/2 cup Superfine granulated sugar
1/2 cup Confectioner's Sugar
1 large egg, at room temperature
2 teaspoons Penzey's double vanilla
2 1/4 to 2 1/2 cups King Arthur's All-Purpose flour
1/2 teaspoon baking soda
1/4 teaspoon sea salt
Sparkling sugar for sprinkling

Sift the flour, baking soda and salt into a medium sized bowl, and set aside.

Using a mixer fitted with a paddle attachment, beat the butter in a large bowl on medium speed about 1 minute.  One ingredient at a time, add the vegetable oil, granulated sugar, confectioner's sugar, egg, and vanilla, beating on medium speed after each addition until completely incorporated.  Add the flour mixture all at once and mix on low until incorporated.  Dough will be soft.  Refrigerate about 1 hour to make it easier to handle.  Or freeze for 30 minutes.  You may want to re-refrigerate between batches.

Preheat oven to 350°F.  Line baking sheets with parchment paper.  

Using a standard-size ice cream scoop (about 1/4 cup), drop the dough on the prepared baking sheets.  


 The cookies should be spaced 2 inches apart, so I usually get 6 to a sheet.  Press the dough evenly with the palm of your hand to flatten the cookies to 1/4-inch thickness.  


Sprinkle generously with Sparkling sugar.

Bake for 14-16 minutes until the edges turn golden.  Let the cookies cool on the baking sheets at least 10 minutes before transferring them to racks to cool completely.  Makes 12 cookies.


You can also make them in a smaller size (for smaller hands) by using a regular cookie scoop and decreasing the baking time to 8 to 10 minutes.  They will be crisper and less soft in the middle than the giant ones.  The consensus among the locals is that the large cookie is clearly superior.

A word about cookie scoops.  They always have a number on them, either on the back of the handle or on the little thingy that ejects the dough.  The number represents the number of scoops needed to equal 1 quart (32 oz).  For example, my standard scoop for chocolate chip cookies is a #40, which is around 5/8 oz.  And the ice cream scoop is a #16, which is 2 oz or 1/4 cup, and the one I prefer for this recipe is #20, which is about 1.75oz.  It's not science, so whatever you have on hand is fine.

CHOCOLATE DIPPED:  

Follow sugar cookie recipe, except omit the Sparkling sugar.  When they are cool, move them to a piece of waxed paper large enough to hold them.  Melt bittersweet or semisweet chocolate in a bowl that will allow you to dip the cookies into it about 1/4 of the way.  You will have to melt more chocolate than you will use, but you could spoon the leftovers over ice cream.  Then you just dip them, like this:


And put them on the waxed paper.  Transfer them to the freezer on a half-sheet pan for about 20 minutes, and the chocolate will firm up, and you'll be able to lift them off the waxed paper.  You can eat them right away, or move them to a freezer bag.  


LEMON VARIATION:


1/2 cup (4 oz or 1 stick) butter, at room temperature
1/2 cup (4 oz) canola oil
1/2 cup Superfine granulated sugar
1/2 cup Confectioner's Sugar
1 large egg, at room temperature
1/2 teaspoon lemon oil
Finely grated zest of one lemon (preferably Meyer)
2 1/4 to 2 1/2 cups King Arthur's All-Purpose flour
1/2 teaspoon baking soda
1/4 teaspoon sea salt

Lemon Glaze:  1 1/2 cups Confectioner's sugar, 1/2 teaspoon lemon oil, finely grated zest of one lemon, and enough lemon juice to make a spreadable but not too thin glaze or frosting.

Sift the flour, baking soda and salt into a medium sized bowl, and set aside.

Using a mixer fitted with a paddle attachment, beat the butter in a large bowl on medium speed about 1 minute.  One ingredient at a time, add the vegetable oil, granulated sugar, confectioner's sugar, egg, lemon oil and lemon zest, beating on medium speed after each addition until completely incorporated.  Add the flour mixture all at once and mix on low until incorporated.  Dough will be soft.  Refrigerate about 1 hour to make it easier to handle.  Or freeze for 30 minutes.  You may want to re-refrigerate between batches.

Preheat oven to 350°F.  Line baking sheets with parchment paper.  

Using a standard-size ice cream scoop (about 1/4 cup), drop the dough on the prepared baking sheets.  The cookies should be spaced 2 inches apart, so I usually get 6 to a sheet.  Press the dough evenly with the palm of your hand to flatten the cookies to 1/4-inch thickness.

Bake for 14-16 minutes until the edges turn golden.  Let the cookies cool on the baking sheets at least 10 minutes before transferring them to racks to cool completely.

Glaze:  Whisk glaze ingredients in a medium-sized bowl.  Place a heaping Tablespoon in the center of each and spread slightly.  Either let them set for several hours, or speed-set them in the freezer before serving or storing.


Makes 12 cookies.

Another little tip:  There's a certain art to taking cookies out of the oven when they are slightly under-done, then letting them sit on the sheets for a few minutes.  If you are using the sheets of parchment, it is then possible to slide the whole thing, paper and cookies onto the counter to cool.  And Voila!  you have a clean cookie sheet and no clean-up.  

However, if you have allowed them to stay in the oven a little longer and you don't want them to keep cooking, you can transfer them to the counter immediately and the coolness of the counter will prevent additional cooking.  Again, this is something that you will learn by trial and error.  And it's the trying (and eating) that makes it fun to learn to do.

Sunday, September 2, 2012

Scones

I have a philosophy about treats.  I think that it's perfectly okay to indulge, even daily, as long as you limit yourself to one tasty bite.  And since it's only going to be one small thing, it had better be extra, super good.  So I indulge in the best ingredients, and I continue tweaking recipes until one bite is really satisfying.  And I freeze them after one serving, so the quality stays high while we eat our way through the "Treat drawer."  I like to change flavors up a bit, so there's usually something very chocolate-y, something with butter, nuts and chocolate, and something with citrus, for example.  Then every night after dinner, Steve, Mom and I have the moment of truth when we have to choose.  We usually each choose something different, which makes it more interesting.

I have another theory.  You have a much better chance of working off calories that you eat in the morning.  So a calorie intense treat (of a reasonably small size) is okay.  Don't you just love these rules?

So now to today's recipes:  Scones, my favorite breakfast treat.  At first I used King Arthur flour mixes, which only require that you add an egg, butter, milk, and a little salt.  But once I discovered the recipe for chocolate chip-cherry scones in David Leibowitz's The Great Book of Chocolate, I have developed a taste for this type of scone (Thank you, Ben, for the gift ).  In fact, scones do not have eggs in them.  That makes them more of a cake, when it is their nature to want to be a biscuit.  I have fooled around with a lot of recipes, and will give you my personal favorite here.  As you know, I am always tweaking recipes, so what you see here will be slightly different than the original.

For example, I love using Boyajian's citrus oils, and have been giving little samples away ever since I accidentally ordered 3x the amount I thought I did last Christmas.  Whenever a recipe calls for lemon, lime or orange, I throw in 1/2 teaspoon of the appropriate oil, even if I am also adding juice or zest.  It just punches up the flavor.  And if I don't happen to have an orange or lemon hanging around to zest, I use 1 teaspoon of the oil.  The oil is distilled from the rind, which is the strongest flavor in the fruit, so it works. 

When I first started making scones, I was kind of scared of them, because every cookbook cautions against overworking the butter, keeping it cold, not letting it melt.  Plus, as soon as you add liquid to flour, you have to worry about gluten forming, making things gooey and chewy rather than light and flaky.  But while that is true, these recipes are pretty forgiving.  One reason is that I freeze the butter, which keeps it from melting into the dough (Thank you, Nigella), and buttermilk is acidic, which helps keep the gluten from forming.  Still, you want to work as quickly as possible, and frankly, it doesn't take very long.  So have no fear!

A few words about equipment:  After spending far too much on cookie sheets over the years, I am now using a simple Nordicware half-sheet pan I picked up from Wegmans, lined with parchment.  I actually have six or seven half-sheet pans because you can use them for everything.  I used to use rolls of parchment, but since discovering the half-sheets at King Arthur Flour, I keep those on hand.  They absolutely protect the pan, aren't all curly and unruly, and I often don't even need to wash the pan.  And the baked goods never stick.

I am also a fan of Microplane graters.  They are wicked sharp, so I have recently gotten their glove (I found it at Williams-Sonoma, but I'm sure it's available elsewhere), which eliminates the risk of inconvenient (and unsightly) kitchen grating accidents.  Here is a photo of the two microplanes I use, the one on the left is for grated fruit zest (or rind as we say it in the non-chef world), and the other for grating the butter.   Along side them is my bench scraper, which is handy for cutting scones and for scraping flour up from the cutting board.  (By the way, the easiest way to clean up when using flour is to use the bench scraper to scoop the flour directly into the trash.  If you empty the flour into the sink and try to use water you make...wait for it...paste!)


CHERRY-CHOCOLATE CHIP SCONE RECIPE

1 cup AP flour
1 cup cake flour (such as King Arthur's Queen Guinevere)
1/4 cup superfine sugar
1 teaspoon baking powder
1/2 teaspoon baking soda
1/4 teaspoon fine sea salt
1/2 teaspoon grated orange zest (if you have an orange)
4 oz (1 stick) butter, frozen at least 30 minutes
1/2 cup shaken buttermilk, room temperature
1/2 teaspoon orange oil (if you have the zest) or 1 teaspoon if you don't
1/2 cup semi-sweet or bittersweet chocolate chips
3/4 cup dried Morello cherries

3 Tablespoons superfine sugar
1/4 teaspoon cinnamon (Penzey's Vietnamese or Chinese Cassia are my favorites)


Preheat oven to 375 degrees F.  Place a piece of parchment paper in a quarter sheet baking pan.

In a large bowl, whisk flours, sugar, baking powder, soda, salt, and orange zest (if using).  Using a large microplane grater, grate the butter over the dry ingredients, mixing occasionally with a fork.  (You can see photos of what this will look like below in the Lemon Blueberry recipe).  Add orange oil to the buttermilk, pouring it into a well in the center of the flour/butter mixture, and stir until the dough holds together.  Add chocolate chips and cherries.  It will still seem somewhat dry, but don't worry about that.

Turn the dough out onto the parchment paper (saves on the cleanup), and knead just until you can shape it into a thick disk, about 7" in diameter.  Using a bench knife or other sharp knife, cut the circle into 8 pieces, and separate them from one another so they don't get too cozy during baking. After you have found a home for them on the pan, flatten them a little with the palm of your hand.  Mix cinnamon into sugar and sprinkle over the tops.

Bake 14-16 minutes.


A word here about the add-ins.  Fresh fruit does not do well in scones because the pastry is too stiff (unlike muffins, which are softer).  I have a wonderful source of dried fruit, Meduri, which is mail-order.  I particularly like their Harvest peaches, blueberries, and Morello cherries.  But feel free to experiment with other dried fruits.  Chocolate chips and toasted nuts (pecans, walnuts or almonds) are good too.


Another note about buttermilk.  It definitely makes a difference in the tenderness of the scone.  In a pinch I have tried "emergency substitutions," like 1 Tablespoon of white vinegar or lemon juice in milk, but I have to say it does not have the same effect.  So try to get the buttermilk.

LEMON-BLUEBERRY:

Note:   Meyer lemons are an interesting cross-breed of citrus that tastes strongly of lemon without being sour.  Tart, but not sour.


1 cup AP flour
1 cup cake flour (such as King Arthur's Queen Guinevere)
1/4 cup superfine sugar
1 teaspoon baking powder
1/2 teaspoon baking soda
1/4 teaspoon fine sea salt
Finely grated zest of one Meyer lemon
4 oz (1 stick) butter, frozen at least 30 minutes
1 cup dried blueberries
1/2 cup shaken buttermilk, room temperature
1 teaspoon lemon oil

Sparkling sugar
       or
Lemon Glaze:
       Finely grated zest and juice of one Meyer lemon, plus 1/2 teaspoon lemon oil
       1 cup Confectioner's sugar or enough to make a smooth glaze (you want to drizzle it)

Preheat oven to 375 degrees F.  Place a piece of parchment paper in a quarter sheet baking pan.

In a large bowl, whisk flours, sugar, baking powder, soda, salt, and lemon zest.  Using a large microplane grater, grate the butter over the dry ingredients, mixing occasionally with a fork.  I always appreciate knowing what this is supposed to look like, so Steve took these excellent step-by-step photos:


Add lemon oil to the buttermilk, pouring it into a well in the center of the flour/butter mixture, and stir until the dough holds together.  Then stir in the blueberries.  It may still seem somewhat dry, but don't worry about that.  It will look approximately like this:


Dump the dough out onto the parchment paper (saves on the cleanup), like this:


and knead just until you can shape it into a thick disk, about 7" in diameter.


Using a bench knife or other sharp knife, cut the circle into 8 pieces,


and separate them from one another so they don't get too cozy during baking. After you have found a home for them on the pan, flatten them a little with the palm of your hand.  You'll notice that some of these have been flattened and some are still standing tall.


If you are using Sparkling sugar, sprinkle it on now.

Bake 14-16 minutes.

If you are using the Lemon Glaze (much more intense lemon flavor if you do), wait until the scones have cooled about 5 minutes, then drizzle the glaze over them.

I made glaze for these:


CHEDDAR-BACON:  


2 cups AP flour
1 Tablespoon superfine sugar
1 teaspoon baking powder
1/2 teaspoon baking soda
1/4 teaspoon fine sea salt
4 oz (1 stick) butter, frozen at least 30 minutes
1/2 cup shaken buttermilk, room temperature
1 cup cooked bacon, cut into 3/4" pieces
4 oz Cheddar cheese, cut into cubes

Preheat oven to 375 degrees F.  Place a piece of parchment paper in a quarter sheet baking pan.

In a large bowl, whisk flour, sugar, baking powder, soda, and salt.  Using a large microplane grater, grate the butter over the dry ingredients, mixing occasionally with a fork.  Add the buttermilk, pouring it into a well in the center of the flour/butter mixture, and stir until the dough holds together.  Add bacon and Cheddar cheese.  It will still seem somewhat dry, but don't worry about that.

Turn the dough out onto the parchment paper (saves on the cleanup), and knead just until you can shape it into a thick disk, about 7" in diameter.  Using a bench knife or other sharp knife, cut the circle into 8 pieces, and separate them from one another so they don't get too cozy during baking. After you have found a home for them on the pan, flatten them a little with the palm of your hand.  

Bake 16-18 minutes.

See how yummy the cheddar looks when it oozes out and bakes:


As you can tell, scones are very versatile and you are only limited by what you decide to toss in.  I got some dried apricots, and I'm thinking I'll combine them with toasted pecans.  I will probably put orange oil in with that which will actually emphasize the apricot flavor.

A note on shapes.  The classic scone shape is a wedge from a circle, but you can also make them into circles if you have a large cookie cutter, or make drop scones using a 1/4 cup cookie (or ice cream) scoop.  I suppose they could even be squares.

The scones are wonderful just out of the oven, then pop them into a freezer bag (I date them so I use up the older ones first).  To reheat, put them in the microwave for 18 seconds, then into a cold toaster oven set at 350 degrees for about 5 minutes (in my toaster oven that's about how long it takes the oven to reach temperature).  Your goal is to get them heated through with a little crispness on the crust.